This treatment is for a large ecclesiastical window 3011cm high by 574cm wide. With large projects such as this accuracy and alignment is key.
In order to create a timber, face fixed frame for the bespoke secondary glazing unit for this project, our development engineer first produced a tracesheet template based on measurements obtained at survey.
 Tracing - template
Each tracing needs to be replicated accurately in timber to ensure a tight fitting for the secondary glazing. Any deviation from the template in either curve or alignment is magnified by the sheer scale of each element.
Six pieces of timber are required to create the gothic arch frame. Both sides of the curved arch are joined together by two half lapped joints (No1 & No2). The whole piece is then joined at the top by a glued butt joint (No 3).
Tracing - template
Each tracing needs to be replicated accurately in timber to ensure a tight fitting for the secondary glazing. Any deviation from the template in either curve or alignment is magnified by the sheer scale of each element.
Six pieces of timber are required to create the gothic arch frame. Both sides of the curved arch are joined together by two half lapped joints (No1 & No2). The whole piece is then joined at the top by a glued butt joint (No 3).
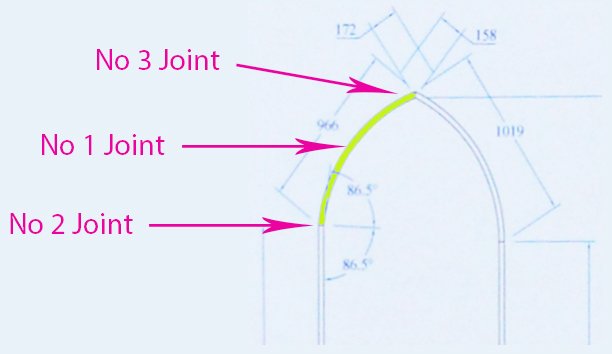 Measurements and angles
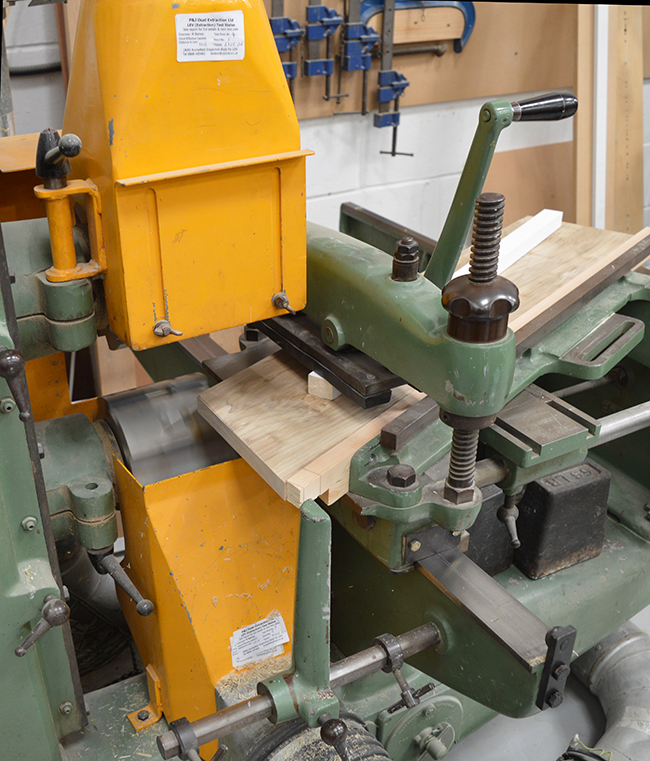 Tenoner machine – creating cut for half lap joint
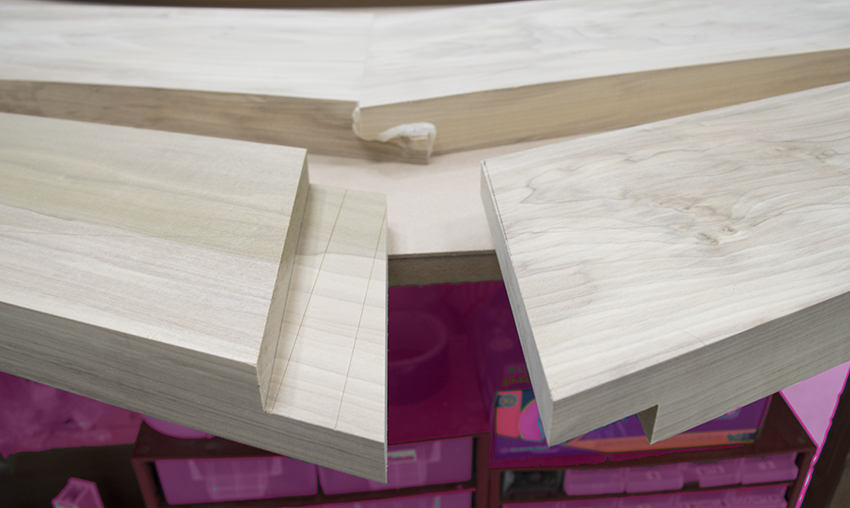 Two pieces cut to make a half lap joint
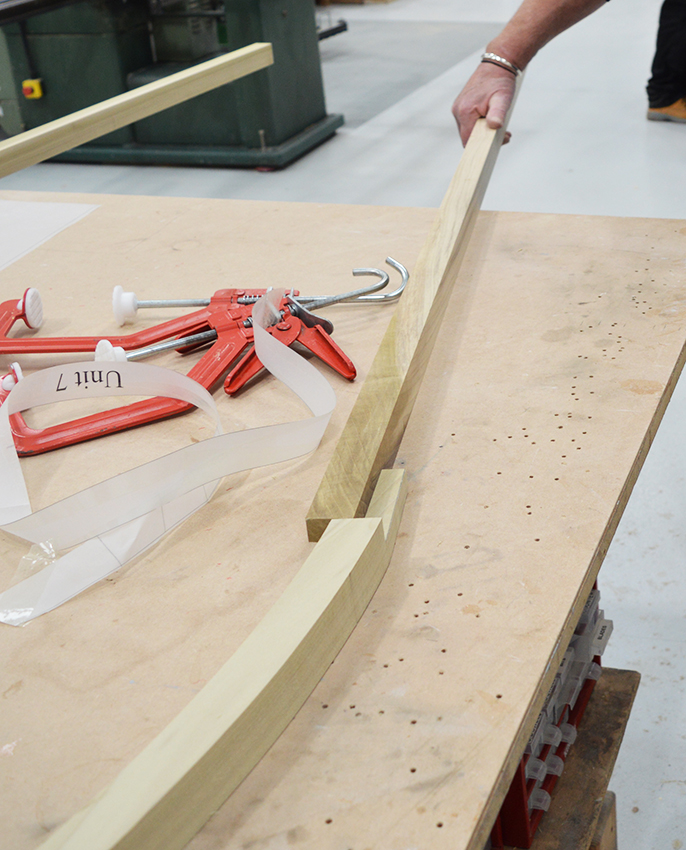
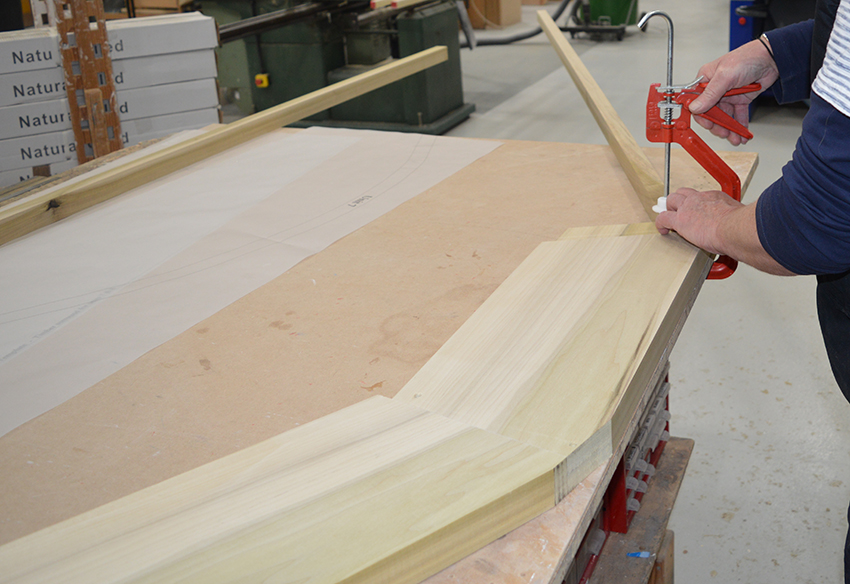 Lining up upright to arch
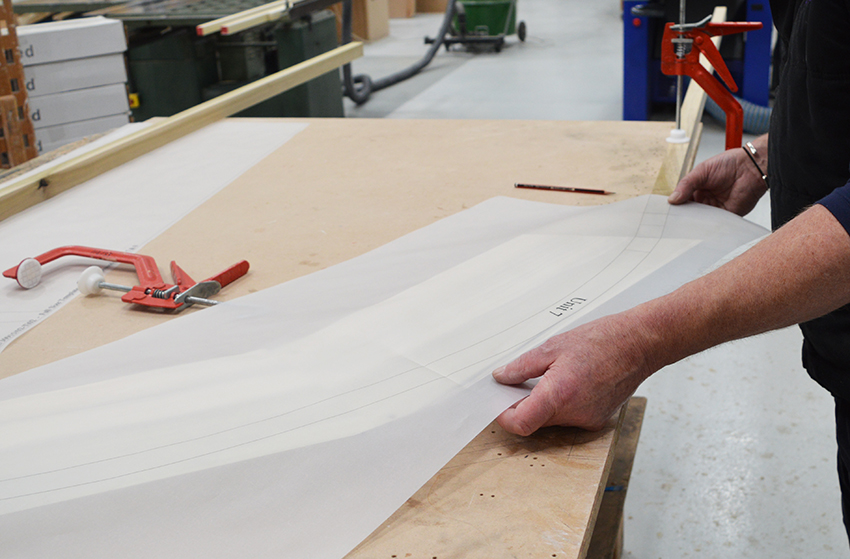 Adding tracing sheet to work pieces
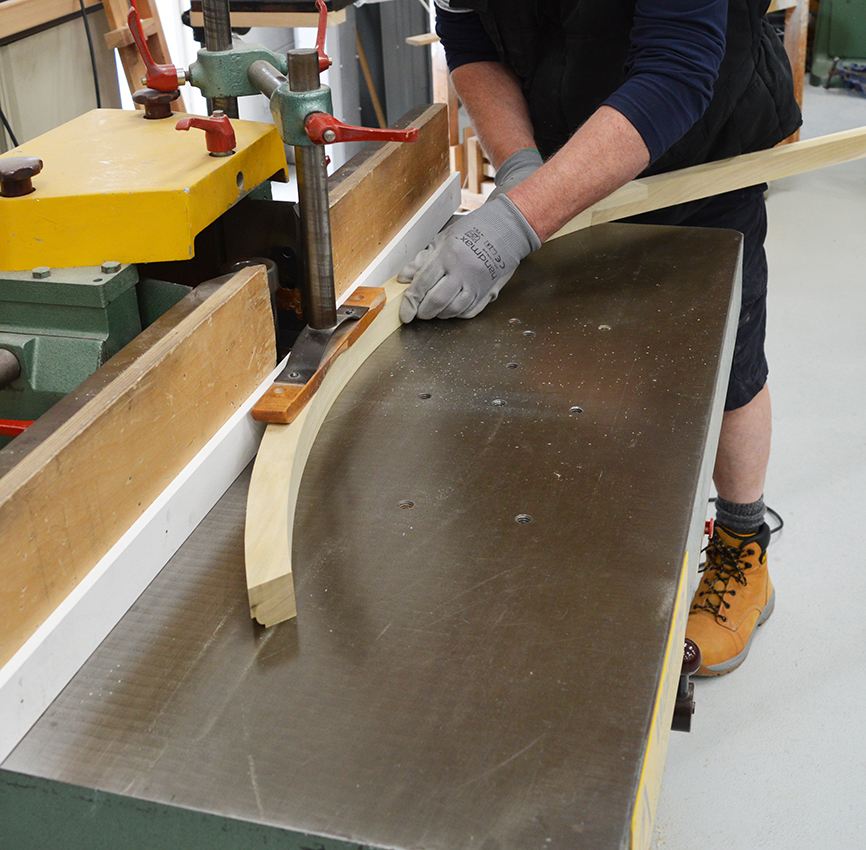
 Template in place for cutting arch
The curve of the arch is now created using a bansaw. Great skill is required on the part of the operator to ensure that the finish is smooth and follows the template exactly.
Template in place for cutting arch
The curve of the arch is now created using a bansaw. Great skill is required on the part of the operator to ensure that the finish is smooth and follows the template exactly.
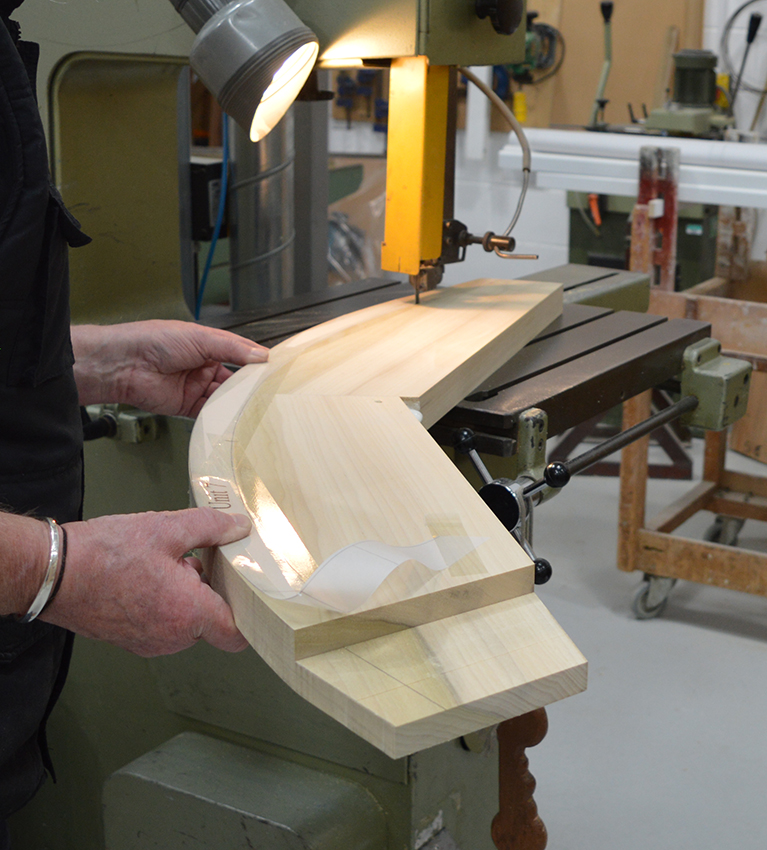 Cutting out the arch
 Joining No 2 Joint
The right side of the arch is now complete and work will now commence on the left side.
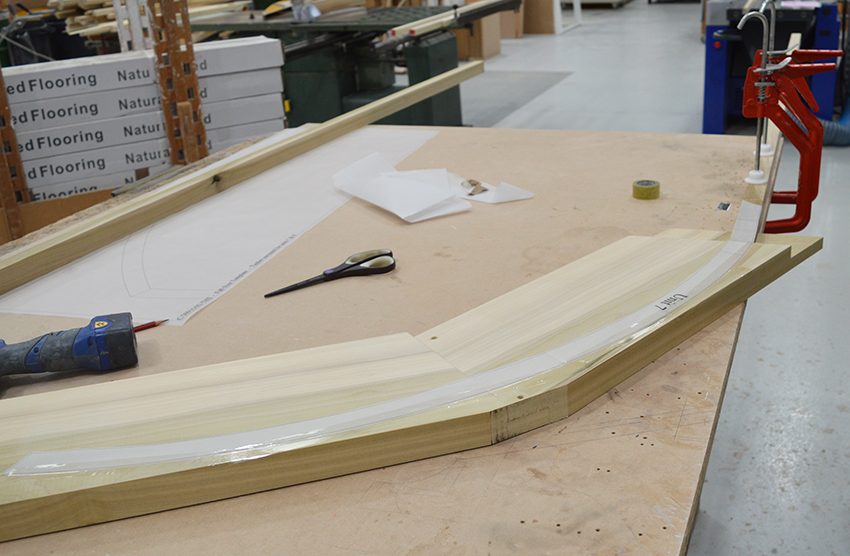
Whilst the arch is taking shape in the timber department, the bespoke Series 42 curved fixed panel secondary glazing unit is being manufactured. The skill of our timber shop and our curves team results in a finished product which affords optimal fit between the new frame and the secondary unit.
Joining No 2 Joint
The right side of the arch is now complete and work will now commence on the left side.
Whilst the arch is taking shape in the timber department, the bespoke Series 42 curved fixed panel secondary glazing unit is being manufactured. The skill of our timber shop and our curves team results in a finished product which affords optimal fit between the new frame and the secondary unit.
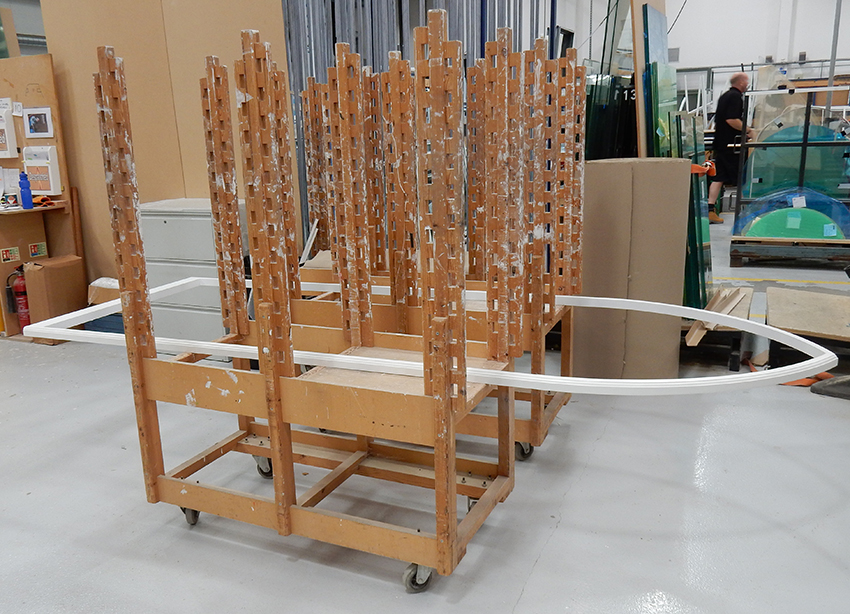
 Timber half arch and secondary - work in progress
 Cutting ovolo moulding
Before both halves of the arch are assembled an ovolo moulding is added to each.
Cutting ovolo moulding
Before both halves of the arch are assembled an ovolo moulding is added to each.
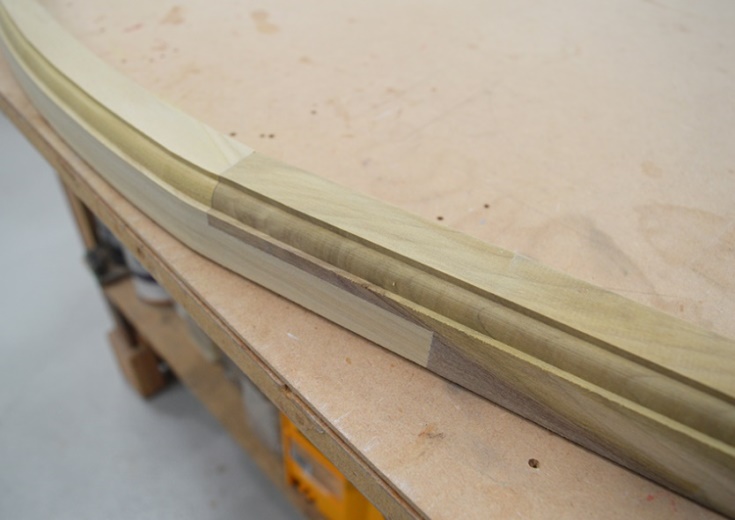 Ovolo – half lap joint detail
 Fully factory finished curved joinery frame, ready for installation
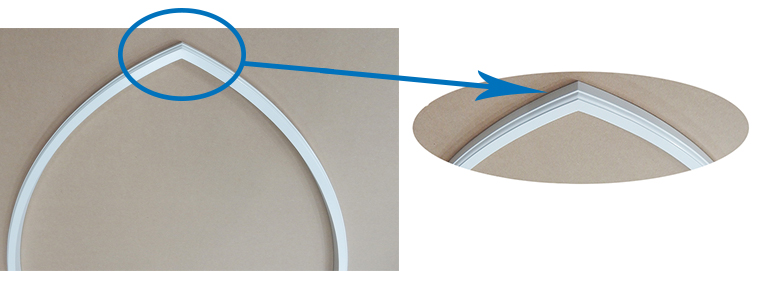 Completed arch – with butt joint detail
Once complete the joinery frame will be fitted to the wall face providing the reveal into which the bespoke Series 42 curved fixed panel secondary glazing unit is installed.
Completed arch – with butt joint detail
Once complete the joinery frame will be fitted to the wall face providing the reveal into which the bespoke Series 42 curved fixed panel secondary glazing unit is installed.
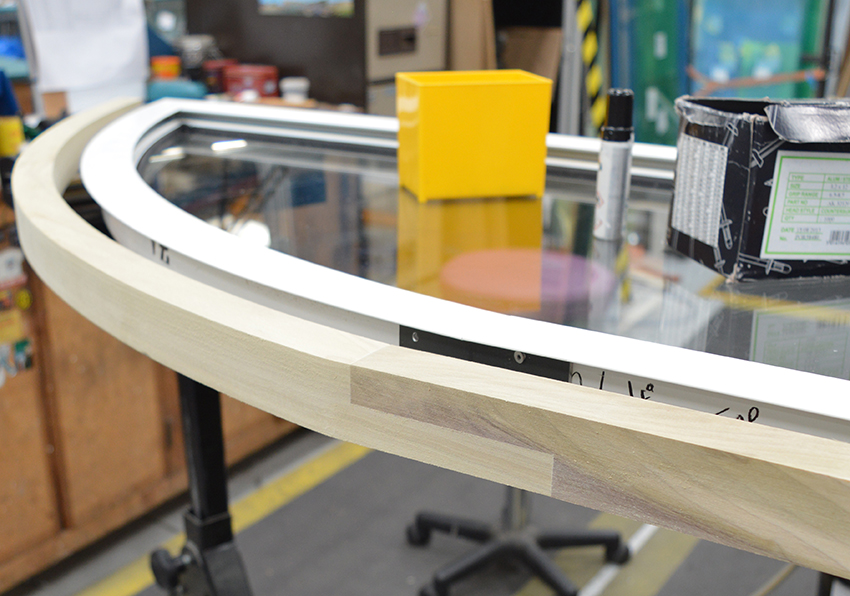
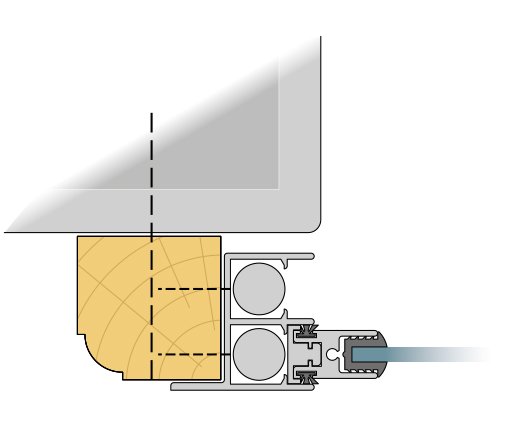 Face fixed secondary glazing with ovolo moulding
Tracing - template
Each tracing needs to be replicated accurately in timber to ensure a tight fitting for the secondary glazing. Any deviation from the template in either curve or alignment is magnified by the sheer scale of each element.
Six pieces of timber are required to create the gothic arch frame. Both sides of the curved arch are joined together by two half lapped joints (No1 & No2). The whole piece is then joined at the top by a glued butt joint (No 3).
Measurements and angles
Making a half lap joint
A half lap joint consists of two wood sections which lap one another. This gives a very strong, face to grain joint which affords the carpenter ample gluing surface.Joint No1
Prior to joining, the two pieces that make up the arch are first cut at the angle prescribed by the template. To make a clean half lap joint the tennoner needs to be calibrated to cut to a depth exactly half the thickness of each work piece.
Tenoner machine – creating cut for half lap joint
Two pieces cut to make a half lap joint
Joint No2
When the first joint is secure the second half lap joint is lined up on the preparation table. With the upright section in place, the tracing can be placed over the three work pieces. From the tracing, the carpenter is able to cut out the shape of the arch.
Lining up upright to arch
Adding tracing sheet to work pieces
Template in place for cutting arch
The curve of the arch is now created using a bansaw. Great skill is required on the part of the operator to ensure that the finish is smooth and follows the template exactly.
Cutting out the arch
Joining No 2 Joint
The right side of the arch is now complete and work will now commence on the left side.
Whilst the arch is taking shape in the timber department, the bespoke Series 42 curved fixed panel secondary glazing unit is being manufactured. The skill of our timber shop and our curves team results in a finished product which affords optimal fit between the new frame and the secondary unit.
Timber half arch and secondary - work in progress
Creating an ovolo moulding
Cutting ovolo moulding
Before both halves of the arch are assembled an ovolo moulding is added to each.
Ovolo – half lap joint detail
The final No 3 joint
At the top of the arch is a simple butt joint. Due to the nature of the construction of the timber frame, the fixing sections at the top of the arch are such that any half lap joint would have to go across the grain. Because of this the butt joint is the best method for completing the whole. Once complete the timber frame is spray coated and left to dry.
Fully factory finished curved joinery frame, ready for installation
Completed arch – with butt joint detail
Once complete the joinery frame will be fitted to the wall face providing the reveal into which the bespoke Series 42 curved fixed panel secondary glazing unit is installed.
Face fixed secondary glazing with ovolo moulding
- Date
- Category
- Secondary Glazing in Practice